Yes, you read that correctly. Using projectors in the sewing industry is a thing. Not all sewing tools come from sewing or craft stores. I am excited to share my adventures with you as I learn to incorporate the technology in my personal sewing studio at Stacey Sansom Designs.
Approximately a month ago, I asked my followers on Facebook if anyone used a projector to cut out their clothing pieces. I did not get any responses from my followers there in the affirmative that they had one they were actively using for that purpose.
I think this is something that most people do not even think about if they are going to the store to pick up a paper pattern each time. However, with the uptick of PDF patterns and their increasing popularity, I think that this will become more popular as people catch on to how easy it supposedly makes cutting for sewing makes. I personally cannot attest to this “easy” but I have watched numerous videos and am just blown away while maintaining healthy amounts of hesitation.
Confession: I loathe printing PDF patterns and then taping all the pages back together so that I can trace the size I need from the original multi-sized patterns so that I do not have to reprint and tape all the pages together again. I have found a lot of very nice patterns for myself but I skip on them because I detest taping together patterns.
I feel that it is appropriate to share my experiences as I set this up. You can expect a few more posts about the projector as I use it for various patterns.
The projector
My husband saw the post and asked if it was what I wanted for Christmas. I love that man! I told him that it was on the list of possibilities but I was still researching it. I even started cleaning up my sewing room and moving things around. I was not even certain that I could make it work with my room as it was.
For Christmas, I received my projector from my husband. I had researched and looked at endless projectors. I had the list narrowed down to 3 different projectors that might work with our ceiling height and my cutting table height. We selected the projector with the “brightest projection” capabilities.
He bought me the Bomaker Parrot I.

This is not the highest recommended projector for sewing purposes, but for most, it is simply because of (1) the cost and (2) the “throw distance” on the projector. I also think that many recommendations are short-sighted and overlook the value of higher resolutions. Maybe that is my graphic design background speaking, but that is still a big area of confusion for me when people are looking for projector recommendations.
One thing to keep in mind when considering a projector that will be ceiling mounted is how you are going to connect your computer or other devices to it. We will likely have to purchase a longer power cable to safely get it plugged in with no dangling cables.
This particular projector is not wifi enabled as is. Thus we purchased adapters to help make life easier. I already had the HDMI to USB-C adapter shown in the above image. I used this for testing purposes. I did initially plug-in the wifi adapter and I got my computer to recognize that the adapter was on the projector, but I could not get it to magically connect and project. We also got the Bluetooth adapter so I can use it via Bluetooth.
Keep in mind that you do not have to purchase all of these at once, but I am not a fan of ladders and that’s the only way that I can get up to something mounted 9 feet in the air. You can also use other adapters. The Google Chromecast device is frequently recommended. I have not had 100% reliable results connecting to a Chromecast from my Macbook Pro so I did not want to use it as a primary source of connectivity. I have also seen people use older Apple TV boxes or Roku Sticks. There are options. With the purchase of the projector, there was a coupon that made one of the adapters free so it made it an easier decision in my opinion to just purchase them with the projector.
Why the brightest?
I personally felt that the “projection brightness” was almost more important than the “throw distance” on the projector in this use case with my circumstances.
I have a room that is open to below on half of 2 walls (in the corner) and opens up to a hallway that opens to below on another wall. The remaining wall has 3 large portrait windows filling the wall. I have beautiful natural light flowing into my sewing studio which helps minimize light-strain-induced migraines. I am grateful for this, but it can cause problems with projectors.
Even with the lights off and the blinds closed, during the daytime, I can have a significant amount of light coming into the room. I need to work with what I have.
First, I do NOT consider cutting with a rotary blade in the dark a safe sewing practice. As a sewing and quilting instructor, this is NOT something that I would ever teach any of my students. It is not something that I am comfortable with from a safety standpoint. I know that there is light coming out of the projector, but I just cannot endorse the practice.
Second, I like the natural light over the light fixture route as a way to keep sewing with migraines as comfortable as possible.
The Bomaker Parrot I does not disappoint on the brightness end. I had the lights on and the blinds open and I still had a very visible image on the wall. I am very pleased with the projection with bright lighting.
My initial experience and thoughts
I have not mounted my projector yet. It will be done soon, but it has not been mounted to the ceiling yet. So the following are from the time I took it out of the box and plugged it in on the table in the guest bedroom.
You can “test” your projector for a variety of things with it on a table or desk aimed toward a wall. You can test the “projection brightness.” This is a quick way to test if it will work for your lighting conditions in your sewing area before committing to a projector and putting in the work that is required to physically suspend it from the ceiling.
For me, I focused on testing the “throw distance” of the projector.
In the manual, the recommended range from the lens to the screen is approximately 5.5 feet up to 30.2 feet. This gives a sizable projection ranging from 50 inches upwards of 300 inches. Keep in mind that this is the diagonal measurement just like on a TV or monitor. I did a quick measurement on the diagonal of my cutting table and estimated that I would need somewhere between 60-66 inches to fill the surface of the table (depending on which table I decided to use in the end).
The question to answer was if I absolutely needed 5.5 feet from the lens to the table surface for it to work? That is a distance of roughly 66 inches. The good news is that I have 72 inches from the ceiling to the table top in its preferred height. The bad news is that this projector is on the larger side of projectors and it has a power cable connection on the back so there is no butting it up against the ceiling to maximize the distance. I effectively lose 12 inches of my space to the projector.
Remember the “throw distance” is from the lens to the projection surface. With this factored in, I only have about 60 inches from the lens to the table top at its current height. I am technically 6 inches too short for the projector’s recommendations. When I think about how many images in the Facebook Projectors for Sewing group look, I am hopeful that I can make up the difference with the added resolution.
I set my projector on the table and moved it to approximately 60 inches from the wall focusing as I went. Why did I focus as I went? The lens sticks out further as you focus at the shorter distances and this was going to reduce the available distance I had to work with even further.
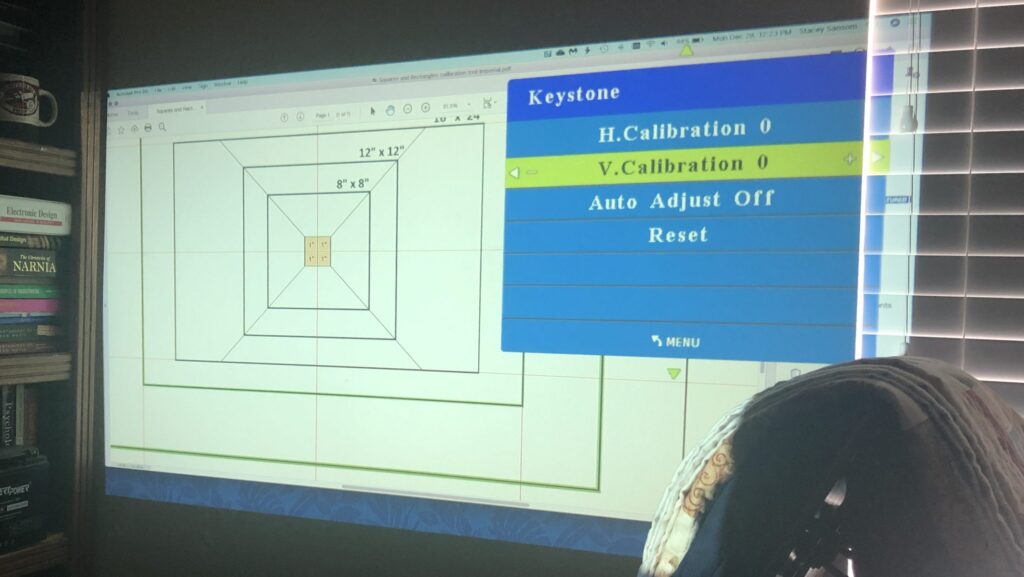
Let me just say that I am impressed with this even in a bright room. It made me happy even though the 72 inches I had planned on from ceiling to table top was giving the appearance that it will not be quite enough to straight mount vertically in the current circumstances.
I fiddled with it a bit and got the image above. This image is roughly the length of my cutting table. I did opt to put the larger glass tabletop for the cutting table when I moved furniture around to make this all work and this meant a tad wider projection.
This test projection is not calibrated 100% to the required calibration for cutting sewing patterns out. That was not my intention for this exercise. The center squares, are roughly 1 inch each, the full yellow square being roughly 2 inches square. The finer calibration was not done for the larger calibration squares on the calibration file.
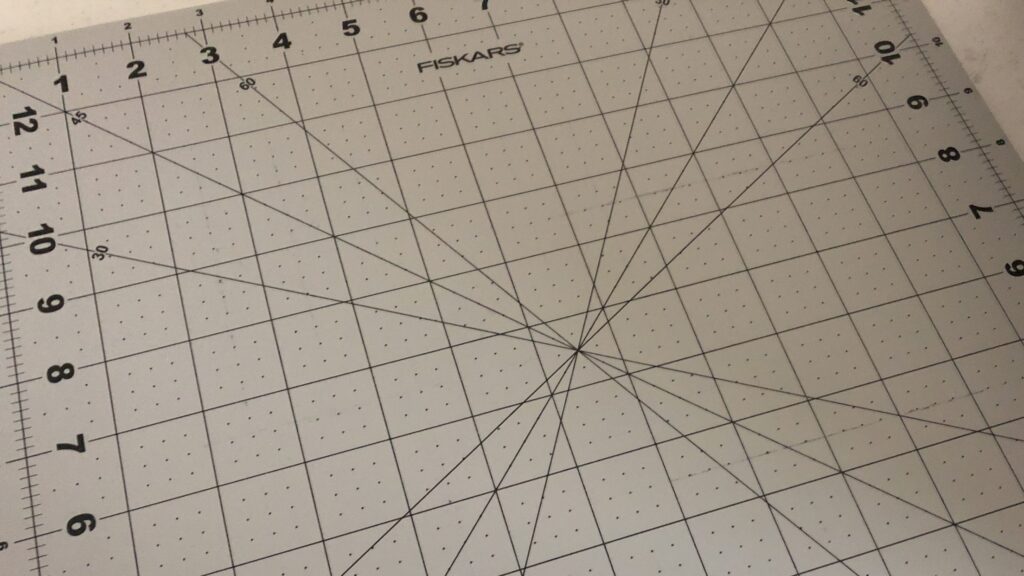
I had my Fiskars rotating cutting mat for quick size checks as I moved the projector and focused the image. It was enough to check that calibration would be achievable. It is. I did not spend the time calibrating on the wall where I would have to hold the mat with one hand and manipulate the zoom in Adobe Acrobat on my computer with the other hand.
I wanted to know if I could get the image crisp and sharp at the distance I have to work with. The answer is, yes. It is not 100% focused at the 60-inch distance but it is a better projection than what many people are getting with their lower resolution projectors. This crispness is important for me with my sensitive eyes and the tendency for blurriness to trigger migraines. I felt this was an accomplishment by itself.
With a few more inches between the lens and the table, I can get the ideal projected size for my cutting surface and get it focused sharply.
I have a couple of options to extend this available distance. (1) I can lower my cutting table a few inches. This is not ideal as I have it as high as it is to prevent back strain while cutting and doing other work at the table. I like the height. (2) I can use a mirror to extend the “throw distance” a few inches. Neither of these options is ideal in my mind, but I am leaning toward the mirror projection so that I can prevent back strain.
Closing thoughts
Overall, I am happy with this projector after my albeit limited initial experiences.
I am not ready to throw it out the window. Many get frustrated because calibration is essential for successful cutting. It can take a lot of adjustments on a lot of things to get it properly calibrated. I do not feel that this is going to be the case if we can compensate for the missing 6 inches of “throw distance.”
I knew going into this adventure that I would have to work around the various conditions such as lighting, connectivity, throw distance, table size, etc. I even have a big ceiling fan in the middle of my room that I have to workaround. Even the placement of the air conditioning vents (intake and output) is a factor I have to workaround.
That is not to say that I will not go purchase a standing desk that goes up and down in the future or get a larger cutting surface that will also allow for a larger cutting mat, but I have seen enough from this short tabletop experiment to know that this can work for my needs in my sewing studio. Using a mirror projection can also make this “larger table” an easier projected image adjustment in the future.
Stay tuned for an update in a few days as we get it mounted and calibrated.
